Wednesday, March 19, 2014

Diy jewlery board

Ok so we are gona do a craft tutorial today. Its not the norm but i love love love this jewlery board i made. I have several but this one is too cute. I had a mirror that got mysteriously broken so instead of throwing it out i removed the back and with gloves removed the glass. But if you don't have an old frame or mirror you can always pick one up at goodwill for a few dollars and paint it if you desire. I bought a yard of fabric for a little over $5 new on ebay and a $3 foam board so the project cost me $8.

Supplies:
Large frame
Screw driver
Spray adhesive
1/2 Yrd of fabric
Large foam board
Scissors
Thumb tacks

My mirror had a back that screwed on so i removed it with the screw driver but if yours is a paper back then cut it open and remove any glass carefully. Trace your frame from the inside onto your foam board. Then with exacto knife or a kitchen knife or box cutter or whatever you have cut out your foam board to fit in your frame. Check it and make sure it fits properly and trim it if necessary. Then place your fabric on the foam board and adjust your pattern if you have one to how you want it to appear in your frame and cut the fabric with sharp scissors leaving about a 2 inch extra allowance for easy gluing. Spray your foam board with the spray adhesive and place your fabric on it smoothing with your hands. Then turn it over and pull your extra fabric around the back which it easy if it is square but if you have a rounded odd shaped frame you may have to cut slits in the rounded areas to pull your fabric tight in the back. Then glue the fabric on the back as well. If you have a back that screws on just simply replace it and screw it on but if your frame had a paper back that you cut use a hot glue gun to glue around the inside rim of your frame and then place the covered foam in. You can then use push pins to put necklaces, bracelets or rings where you desire.

I had clear push pins i wanted to dress up so i used a hot glue gun and added rhinestones to the ends!

Friday, March 14, 2014

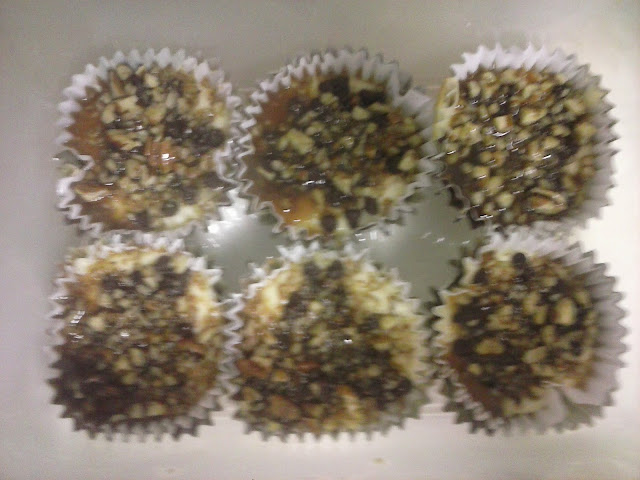
Mini turtle cheesecakes

This is a fairly simple but delicious recipe. Sometimes i make homemade carmel sauce but a jar from the ice cream aisle works just the same. The individual size is perfect for kids and portion control.

Mini turtle cheesecakes
8 oz room temperature cream cheese
1 Egg
1/2 tsp vanilla extract
1/4 C sugar
1/4 C chopped pecans
1/4 C mini chocolate chips
1/4 C carmel sauce
9-12 Oreos
Preheat oven to 325° F
Mix cream cheese, egg, and vanilla extract with hand mixer until well blended and no clumps remain then mix in sugar. Line your cupcake pan with liners and add one oreo to the bottom of each one. Then fill with as much cheesecake mixture as desired. It won't expand much when cooked so fill it as high as you want them. Then top with chocolate chips and nuts and cook for 15 minutes. Remove from oven let cool then heat carmel suace in microwave for 30 seconds and spoon over each cheesecake. Put in the fridge to chill until ready to eat.

I used mega stuffed oreos cus well i LOVE oreos but regular will give a less crunchy "crust".
Also you can make this with fat free cream cheese and sugar free carmel for a lighter version.

These are amazing they won't last through the day!

Fried squash

This recipe is delicious and easy but you have to watch closely so they don't burn.

Fried squash
1 Large yellow squash
1 C white cornmeal
1/2 tsp salt
1/4 tsp pepper
3 Tbsp oil
Cold water

Wash your squash and leave skin on. Then cut off the ends and slice in 1/2 inch round slices. Heat your oil and pan on medium high heat. Fill a bowl with cold water and place in squash slices. In another bowl mix salt, pepper and cornmeal. Shake excess water off of the squash slices and coat them in cornmeal mixture then place them in the pan and watching closely cook them until browned on both sides. Only flip them once during cooking. Place them onto layered paper towels to absorb excess oil and enjoy!

Onion casserole

This is a yummy casserole that has a hint of french onion soup flavor. It goes well with the baked italian and parmesan chicken strips.

Onion casserole
3 large onions or 4 medium ones
3 Tbsp butter
14.5 Oz can cream of chicken soup
2/3 C milk
1 Tbsp soy sauce
2 C shredded Italian 4 cheeses
8 Slices french bread*
Shallow 2 qt casserole dish

Preheat oven to 350°
Slice onions into strips and heat pan over medium high heat and melt butter. Saute onion until clear or a little brown then add them to the 2 qt casserole dish and top with 3/4 C cheese. In a medium sauce pan add undiluted soup, milk, and soy sauce. Whisk sauce until well blended and pour over onion and stir to coat. Then place the bread on top and place in oven for 15 minutes. Once the bread has crisped up and the 15 minutes has passed push the bread down into the onion mixture as much as you can and cover with the rest of the cheese (1 1/4 C) and bake for 15 more minutes. Remove from oven let cool slightly and enjoy!

* More or less bread as necessary. Use enough to cover the top of casserole in one layer.

Baked italian and parmesan chicken strips

Baked italian and parmesan chicken strips

1.5 Lb chicken tenderloin strips
1 1/2 C zesty Italian dressing
1 C Italian bread crumbs
1/2 Grated parmesan
Dash salt and pepper

Preheat oven to 350°
Line a baking sheet with tin foil and spray with nonstick spray. Put chicken and dressing in large ziplock and shake to coat. In a seperate bag put bread crumbs, parmesan and salt and pepper and shake to combine. Then let chicken drip dry and place 2-3 pieces in bag at a time and zip it tight and shake until chicken is coated. Place on baking sheet spray with cooking spray and cook 30 minutes.

Thursday, March 13, 2014

EASY mini fair elephant ears!

This recipe couldn't be easier or more delicious! It taste just like the elephant ears at the fair if not better. I sometimes used homemade biscuts but ill give you guys the fast and easy version.

Easy mini fair elephant ears!
1 Can biscuits
2/3 C sugar
1 Tbsp cinnamon
6 Tbsp melted butter

Preheat your oven to 350°
Ok so first melt your butter then combine sugar and cinnamon in a bowl until mixed well. Open up your biscuits and dip each one in butter and roll until completely coated in the sugar mixture. Then place on a lined and sprayed cookie sheet. Bake 13 minutes or until done then pour the glaze over top (recipe below).

Glaze
2 Tbsp butter
1 1/2 Tbsp warm water
2/3 C powder sugar

Mix all together in bowl until well combined. Mixture should be runny but not too watery. If necessary add more powdered sugar.

Sorry for bad pictures my youngest son had just fallen asleep on my lap and by the time i lay him down there won't be any left haha

Wednesday, March 12, 2014

Tin can chocolate cake!

Ok so we are making tin can cakes as a tester for an upcoming birthday. They are cute and individually sized. We are making 2. You will need 2 14.5 oz cans for this like what green beans, corn, ect comes in washed and dried.

Tin Can Chocolate Cake

3/4 C all-purpose flour
1/8 C cocoa powder
1/2 C sugar
1/2 tsp instant coffee granuals(optional)
1/2 tsp baking soda
1/8 tsp salt
1/2 Tbsp white vinegar
3 Tbsp oil
1/2 C water
1/2 tsp vanilla extract

Preheat oven to 350°
Spray your cans with nonstick spray or crisco then coat with flour cut a piece of parchment or tin foil to fit in the bottom of the can. Then mix all ingredients in a bowl and fill each can about half way. Then place on a baking sheet and cook 45 minutes or until a toothpick comes out clean. Let cool then run a knife around the edge and pour the cake out. Take a bread knife and cut the rounded top off if desired. Then cut into 3 layers. Put icing between each layer and stack back together. You can throw away or eat the rounded part. Then ice as desired.

*Tip*
Make sure your can doesn't have an edge on the inside sticking out or the cake won't slide out. If it does take plyers and pinch the edge down around the entire can. Be careful not to cut yourself the edge is very sharp!

Chocolate Icing

2 C powder sugar
1/4 C cocoa powder
2 Tbsp melted butter
1/4 C milk (more or less depending on consistency you want)
Dash salt

Combine all and mix with a whisk or hand mixer if desired but really not necessary. Enjoy!